Welcome to the April 2014 Really Reasonable Ribbon’s Blog Hop! If you are hopping in the order, you probably came from Bonnie’s Blog at Make Time 2 Craft.I am excited that you are joining us to get lots of inspirations using the April Ribbon Club Assortments. This month’s assortment has lots of feminine and masculine colors, so you can create multiple projects easily. Shall we get started?
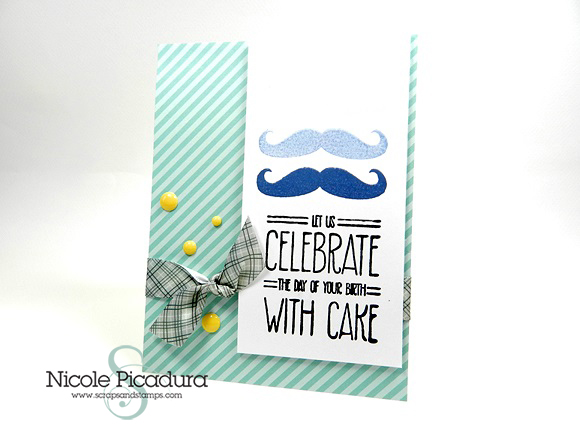
First card I am sharing is a masculine birthday card. I know lots of people struggle when it comes to making masculine cards – are you one of them? I wanted to share how easy and simple it is to put together a card for a guy in your life. They love bright colors too, so use those colors up! For this card, I used the 5/8″ Satin Crosshatch Ribbon to add a nice gray and silver color to the project. They go really well with min and blue colors used here. Don’t you think so?
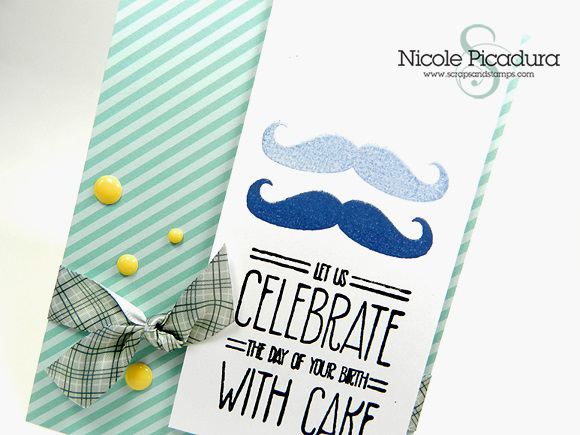
For a fun effect, I did generation stamping technique for this card. To create this effect, take out a dark colored ink pad, stamp the image once and without re-inking it, stamp the same image again on a project. Super easy but it creates a nice result! To add a nice bright color, I used couple of yellow enamel dots.
SUPPLIES for This Card:
      |
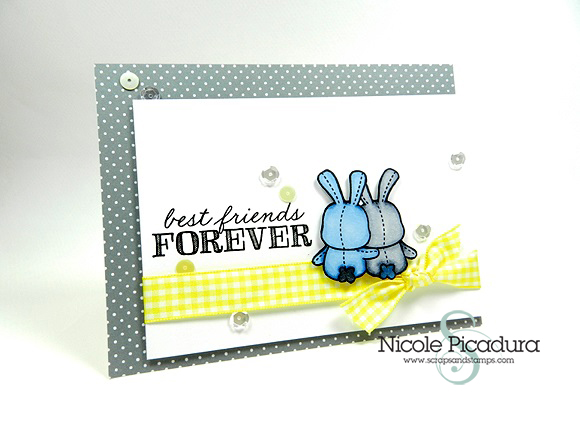
Next card is a super adorable best friends card. Don’t you just love the bunnies here? The picture came out a bit more bright, but the 5/8″ Plaid Yellow Ribbon is a perfect accent for this card. I used a gray background paper with white dots for this one, but you can always change it up and create a different feel with the same ribbon. To make it more feminine, you can use light green, pink, or red. Possibility is limitless! Keep the layer the same and change the colors of the background paper and the ribbon, and you can even create a card set. Perfect gift idea!
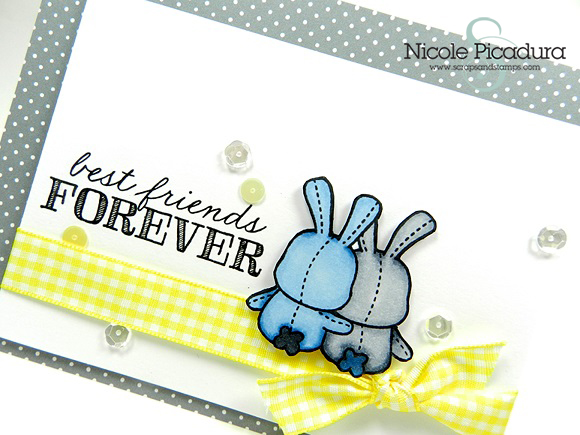
Few people asked me how to create a perfect cut out stamped image for projects. My trick is to stamp and color them first (if you are using an outlined image like I did here), and take a black marker to go around the edges of the image. This hides all the “white” margins of the cut out piece and create a professional look. Give it a try!
SUPPLIES for This Card:
          |
I hope you enjoyed the cards I shared here today. Thank you so much for stopping by and leaving me comments!! I love reading all of your comments and answering any questions, so please make sure to leave some love! Make sure to head over to the next stop of the hop, Cheryl’s Blog at Sweet Designs by Cheryl. Hope you have a happy day!!